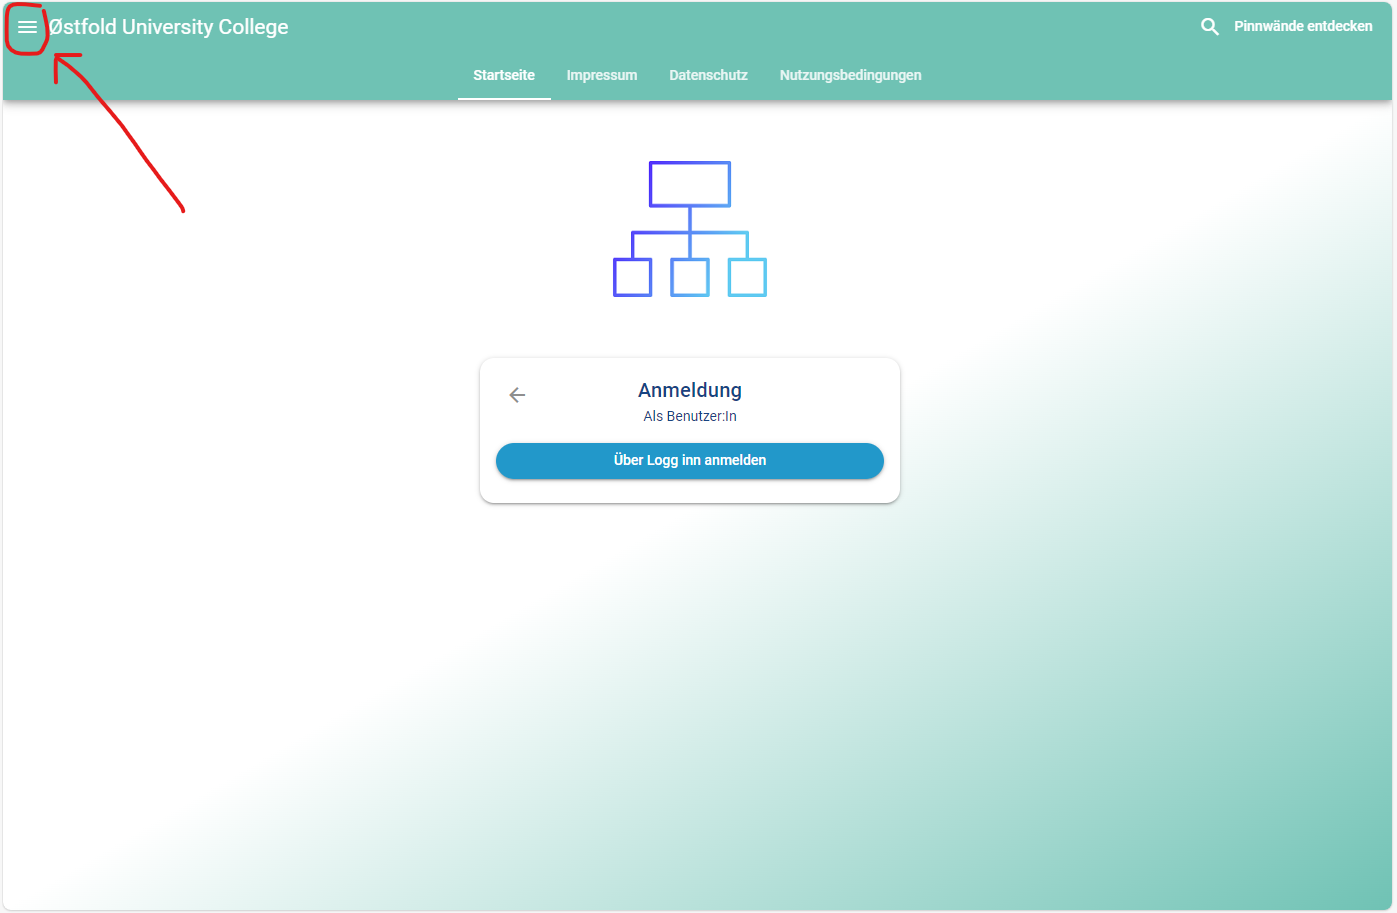
Signing in
Use the link below to log in to TaskCards.
Please note that the default language can often be set to German, information on how this can be changed can be found further down on this page.
If you have problems logging in, you can find a guide here: Login for our services
Changing language
To change the display language in TaskCards, you can click on the hamburger menu at the top right of the page.
Then click on the "SPRACHE"-button that appears in the window that pops up.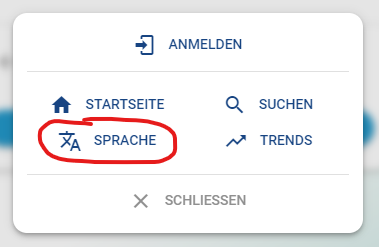
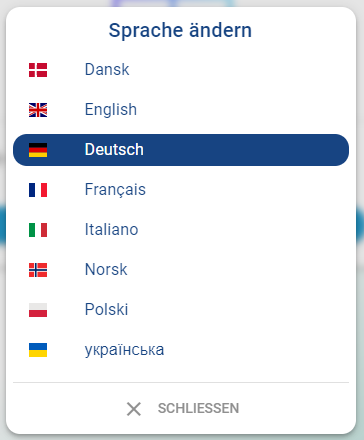
Then select the desired language from the list.
Create a pinboard
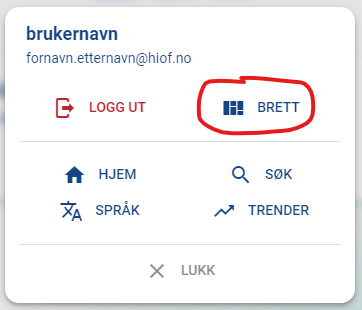
To create a pinboard, first click on the hamburger menu at the top right of the page.
Then click the "Pinboards" button in the window that appears.
Then click the "+"-button at the bottom right of the page.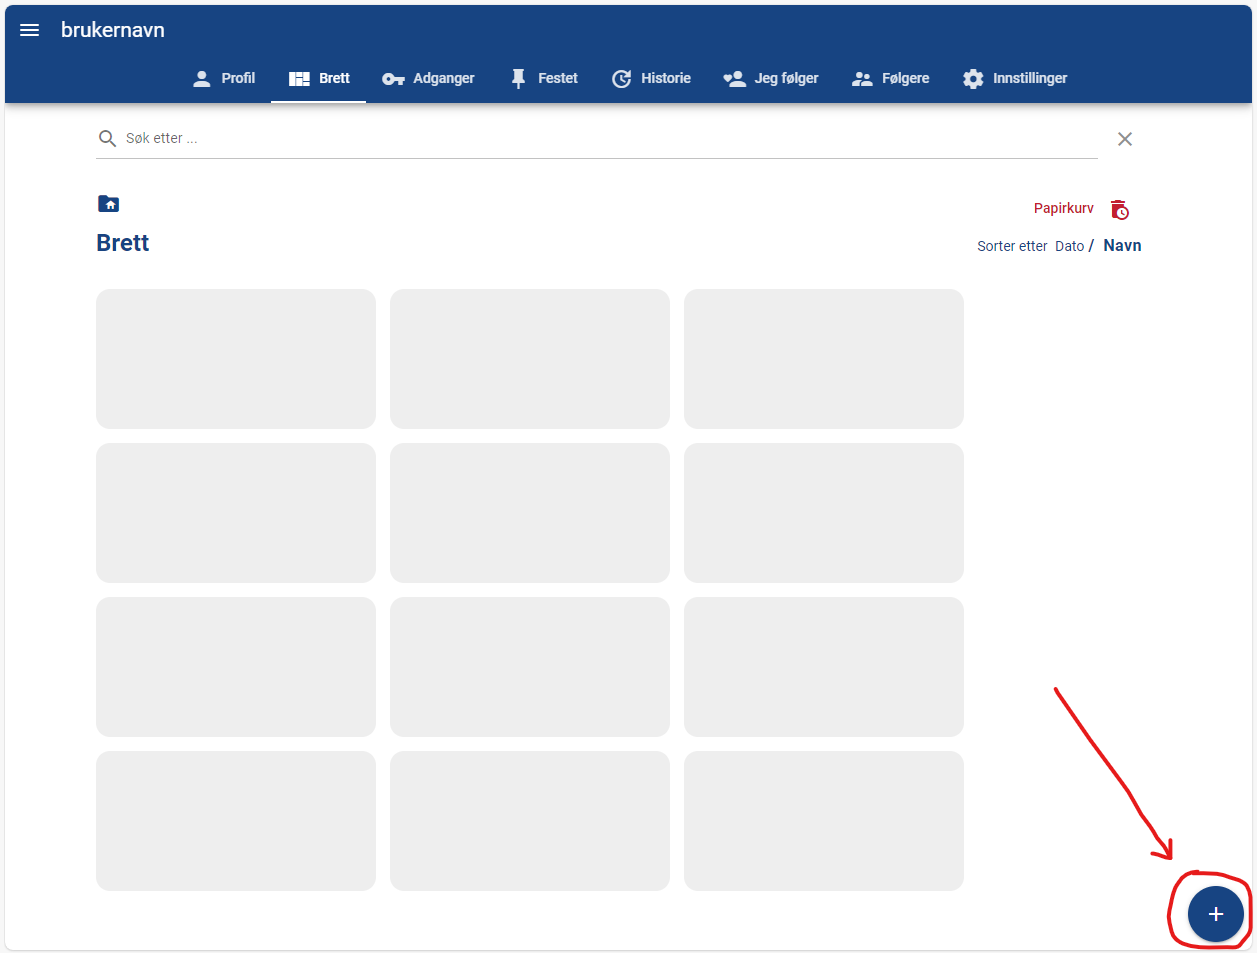
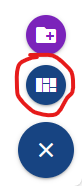
Then click on the square icon that shows a TaskCards pinboard.
The folder icon at the top allows you to create a folder to organize your pinboards.
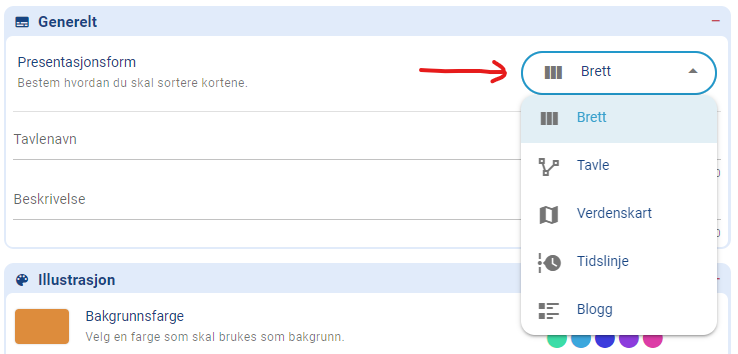
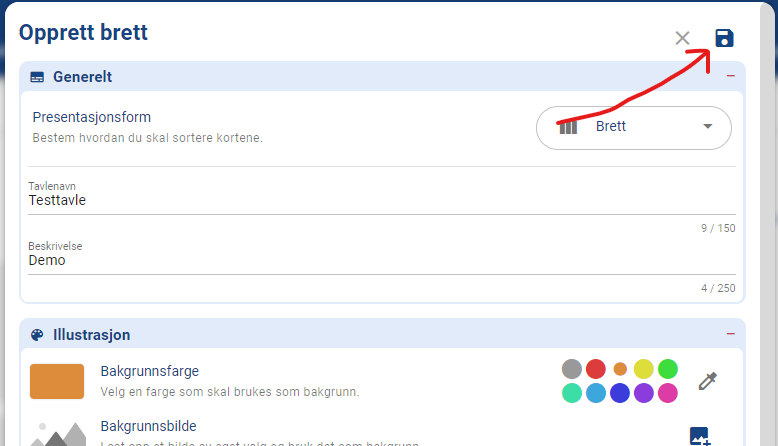
In the window that appears, you get several options for creating a board.
The first thing you have to set is "Presentation form", here there are many choices with different functionality. The choice "Pinboard" is easiest in most cases, but feel free to create a board of each type and familiarize yourself with the functions of the different types.
After this, you give the pinboard a name and a description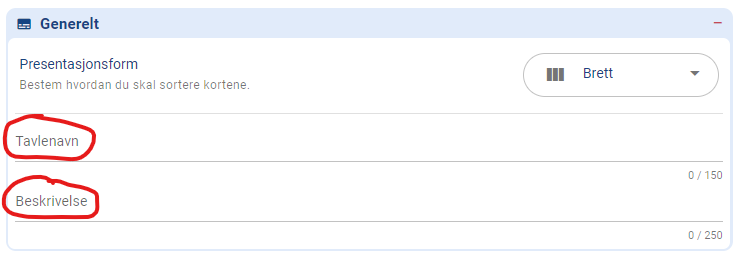
After this, there is nothing more you need to enter. If you want to adjust other settings, you have these options below the "General" field.
To create the pinboard, click the save icon at the top right
When you save your settings the pinboard will be created.
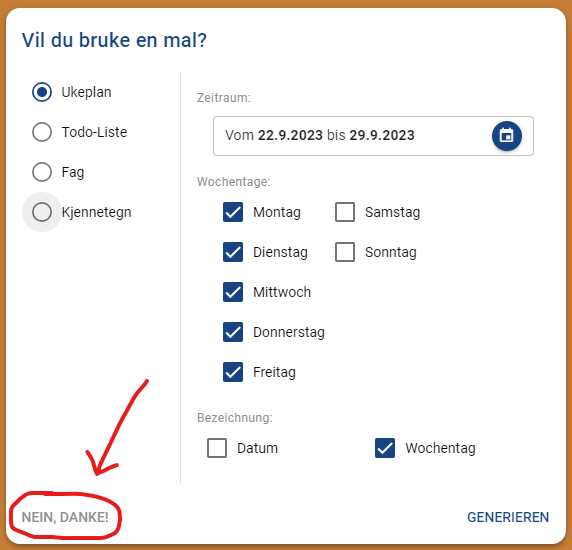
You will then be asked if you want to use a template.
These templates are currently only available in German, so click "NEIN, DANKE!" at the bottom left of the window to continue without a template.
Sharing a pinboard
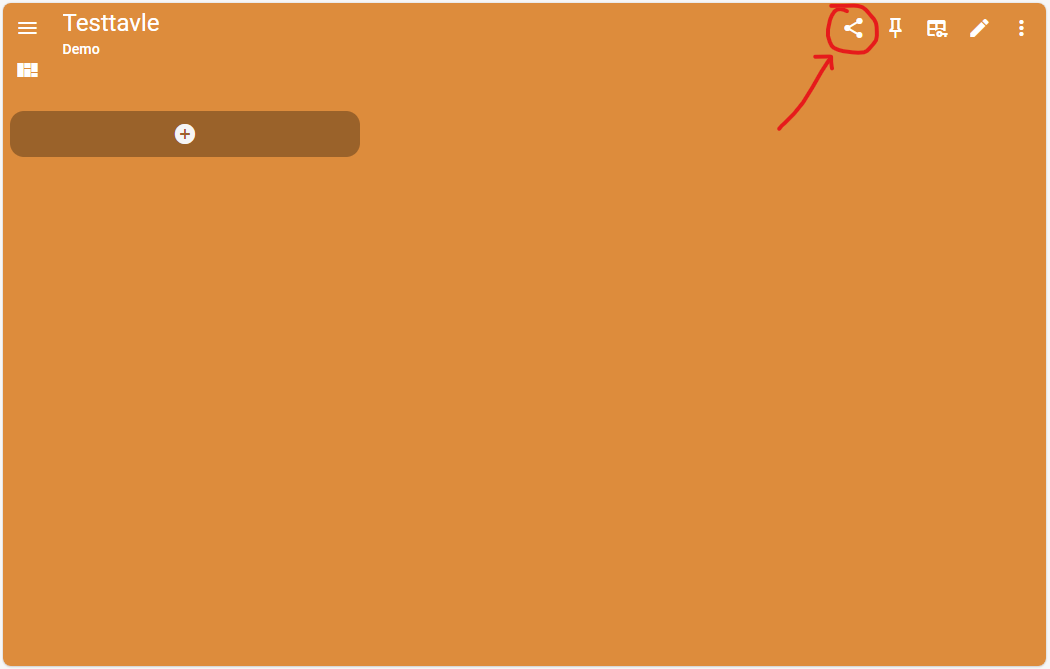
To share a pinboard, you must first have the pinboard open.
From there, you can click the share icon at the top right.
Then select the "New authorisation" button.
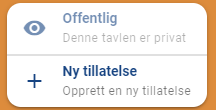
A menu will now appear.
The choices here are as follows:
- Name: The name of the share
- Password: Enter a simple password here that can be shared with those who will access the whiteboard. The password is then requested when someone other than the owner of the board clicks in.
- Rights: Here you can choose between "Denied", "Read" and "Write".
- "Denied" means that even if you have shared a link, you will not be able to view the content until it has been changed from "Denied" to something else.
- "Read" means that those who enter the pinboard only have rights to see the content. They cannot make changes
- "Write" means that those who emter the pinboard can both read and write. This is the right choice if several people are to collaborate on the same pinboard.
- Allow contents: The options here are listed with a description
When you are satisfied with your settings, you can click "Save".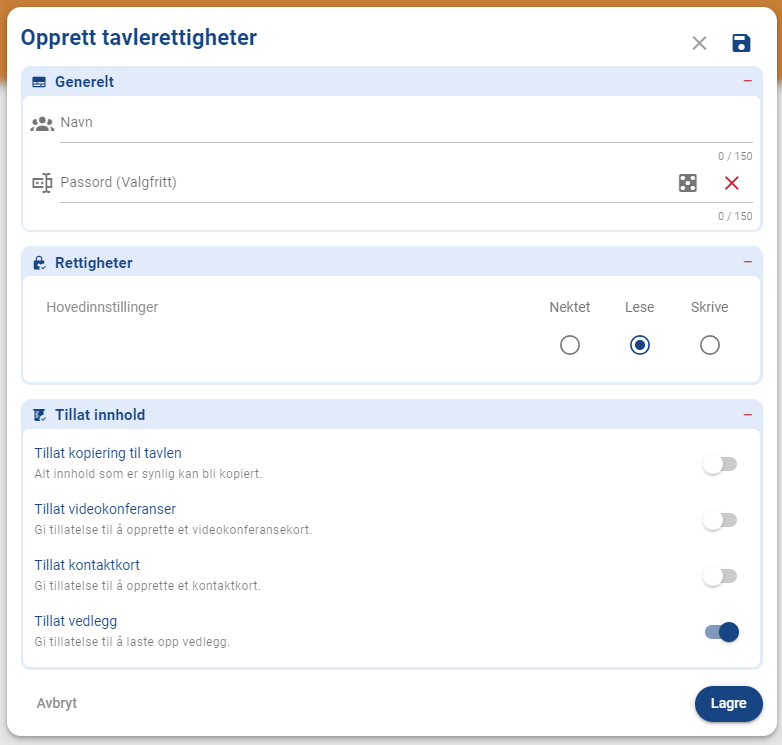
When you have clicked "Save", you will be forwarded to an overview of the sharing settings.
Here the share you created will appear.
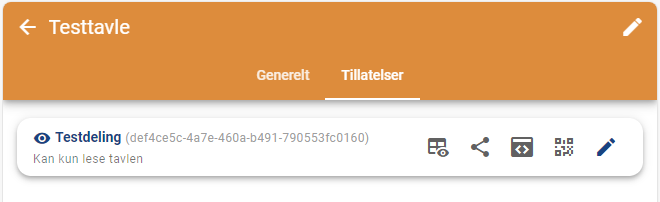
Here you can also adjust the share you have created. You can get more information about the different choices on the right-hand side of the share by holding the pointer over the choices.
Clicking on the share icon will give you the link to the board.