Get started
To start printing via uniFLOW Online, you must first log in to the service. Click the button above and log in with "HIOF MS 365". Use your usual username and password.
Click here for help with logging in
When you are logged in, you will first see an overview of your activity. On this page you will also find "Identities", here you can retrieve the PIN code that you use to log on to the printer.
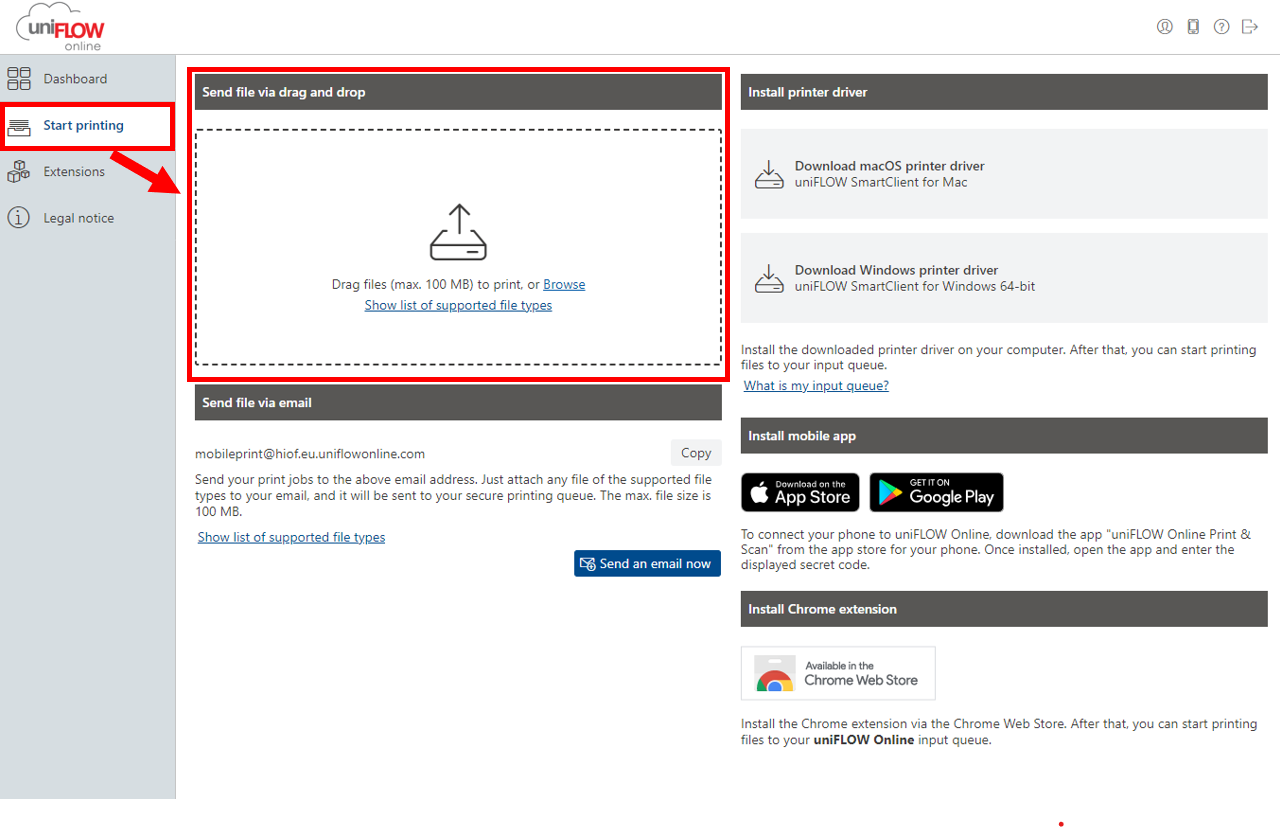
On the left side you will find the menu option "Start printing". From here you can send files to your print queue, or install a printer on your own machine if you print often.
Here you will also find information about supported file types and other methods of printing.
uniFLOW SmartClient (for employees)
uniFLOW SmartClient is the program managing the print queue "HIOF print".
Employees have this program installed automatically.
For employees with older Macs, uniFLOW SmartClient will not be installed automatically. Follow the instructions under Printing > Printing from PC/Mac > Install printer below to install the program.
If the printer queue does not appear on your machine, this may be because the machine has not restarted since installation. Try a reboot before proceeding.
If it has been a long time since the machine has been on campus, or the VPN, it is not certain that uniFLOW SmartClient has been installed. Try connecting to VPN or bring the machine to campus and leave it on for a while. Then do a reboot.
If you have tried the steps above and the printer still does not appear, you can check the status on uniFLOW SmartClient.
You will find an icon for uniFLOW SmartClient on the right side of the taskbar. Right click on this icon and select "About...".
Check that it is your username that appears in the field "Username:" and that "HIOF print" is under "Monitored printers".
If the username is incorrect, restart the machine.
If "HIOF print" is not under "Monitored printers", click "Register again".
If none of these steps work, contact IT-support.
Login to printer
Employee/student card
To retrieve your PIN code you must log in to uniFLOW Online following instructions further up this page, once you are logged in you will find "Identities", note the PIN code displayed here.
The first time you put the employee/student card on the printer, the code from the website will be requested. Enter this and log in. The employee/student card will then be linked to your user account, until later you will be logged in automatically by placing the card on the printer.
Pin code
To retrieve your PIN code, you must log in to uniFLOW Online following the instructions further up this page, when you are logged in you will find "Identities", here you can retrieve the PIN code that you use to log on to the printer.
To log on to the printer, you can enter this code. The code is personal and must not be shared with others.
Printing
Print from the website
If you do not have uniFLOW SmartClient installed, or use a device that is not supported, you can print directly from the website. Go to uniFLOW Online, click "Start printing" and use the "Send file via drag and drop" function.
Here you can either drag a file from e.g. the file manager or your desktop directly onto the website, or click "Browse" to bring up a file selector where you can upload the file you want printed.
Printing from PC/Mac
If you do not have uniFLOW SmartClient installed, it is possible to print either from the website or via e-mail. Instructions for this can be found further down the page.
If you have uniFLOW SmartClient installed, you only need to send the printout to "HIOF Utskrift" in the program you wish to print from.
Install uniFLOW SmartClient
If you print often, it is possible to install uniFLOW Smart Client.
This application allows you to print directly from applications on your device.
To download the uniFLOW Smart Client, go to the "Start printing" button on the left side when you are logged into uniFLOW Online. Then click on Windows or macOS on the right side, depending on the type of machine you are using.
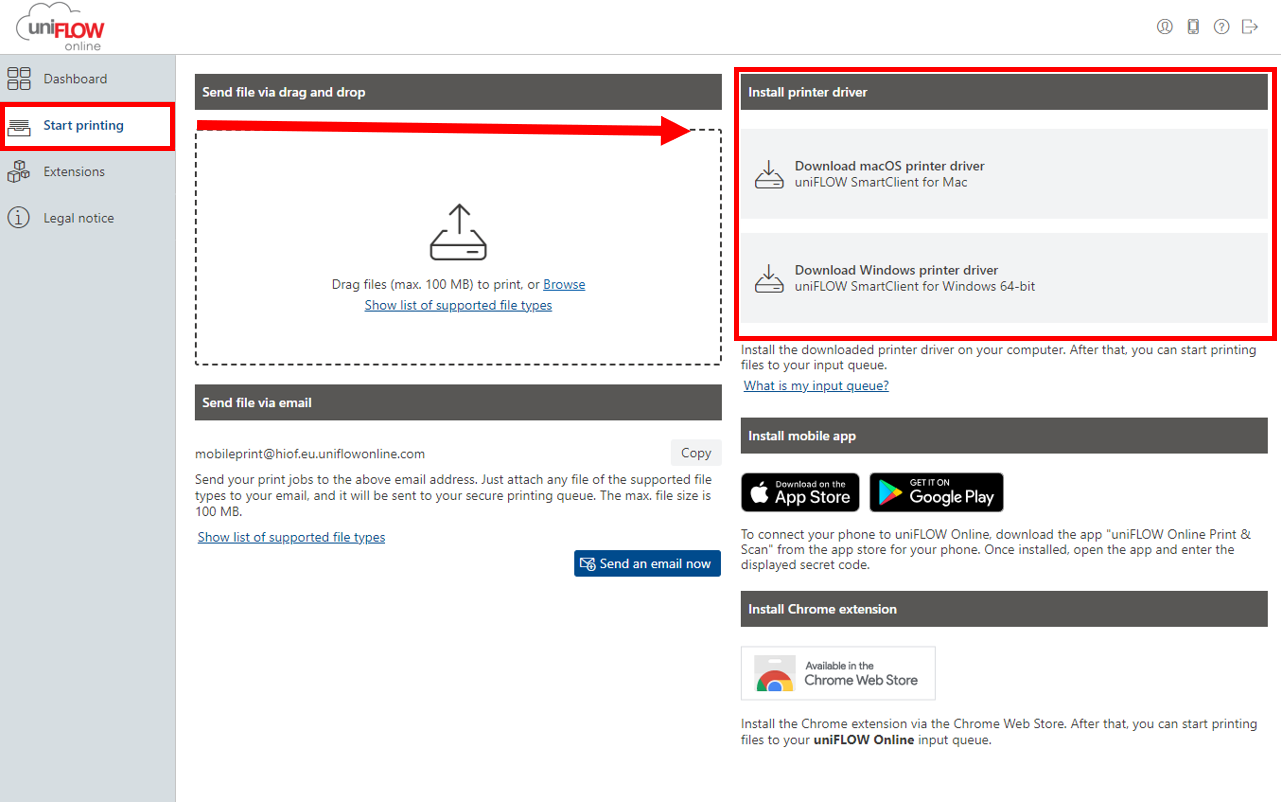
For Windows, an installation file is downloaded. For Mac you get an ISO archive.
When installing on Windows, you only need to follow the steps in the installer.
When installing on macOS, you must first mount the archive, then run the installer in the archive.
There is no Linux client available, for printing from Linux machines you must use "Printing from the website".
Printing from mobile/iPad (app)
uniFLOW Online is available as a mobile app for both iOS, iPadOS and Android.
Note: The uniFLOW Online mobile app is only approved for use with green data. See How to classify data for more information on classification.
Use one of the following links to download:
Android (play.google.com)
iOS/iPadOS (apps.apple.com)
To log in to the app, you can either use manual login, or login via QR code.
For manual login you need to enter our address for uniFLOW Online, enter hiof.eu.uniflowonline.com.
For QR code login, you need the QR code shown in uniFLOW Online under "Start printing".
When you are logged in to the app, you get a dashboard with an overview of your scans and prints. There is also a queue where you can put files ready for printing.
Print via e-mail
Printing via e-mail can be done by adding the file you want printed as a file attachment in an e-mail to mobileprint@hiof.eu.uniflowonline.com from your HIOF e-mail.
To be able to send a printout from a private email address, this address must be registered to you in uniFLOW Online.
On the Dashboard in uniFLOW Online you will find an "Identities" section. At the top of this there is a "New identity" button. By clicking on this, an e-mail address is requested. Enter your private email address here and click "Save".
Printing with Chrome extension
Printing with a browser add-on can be a good option for Chromebooks and Linux machines. The extension is designed for use with Google Chrome. Using the add-on in other browsers is not recommended.
To install the add-on, go to uniFLOW Online (Chrome Webstore).
Click "Add to Chrome"
If you are asked to approve the download or installation, accept this.
Once the add-on has been installed, you will find it on the toolbar at the top of the browser.
Click on the addon, first time you will be asked to provide address, here you can paste hiof.eu.uniflowonline.com.
Then log in with your HIOF account.
Once you're logged into the add-on, it's ready to use!
To print with the add-on, you must use the print function in the browser.
You can find this, among other things, by opening PDF files in a browser, or by selecting "Print" in, for example, Word Online. Select the "uniFLOW Online" printer to send the printout to the queue.
Printing for guests
Gjester kan sende utskrift som vedlegg til mobileprint@hiof.eu.uniflowonline.com, det vil så komme en PIN-kode i svar på e-posten. Denne PIN-koden oppgis på skriveren for å hente utskriften.
Copying
- Hold the student/employee card to the card reader to identify yourself.
The first time you use your card for printing, you will be asked to log in. Use the PIN code you find in uniFLOW Online (more information in the "Login to printer" section above). - If you have forgotten your card, select "Login" in the display. Log in with PIN code.
- The PIN code you find in uniFLOW Online (more information in the "Login to printer" section above).
- Press "Copy" at the top of the display on the printer.
- Place one sheet on the platen glass or several sheets in the top sheet feeder.
- If necessary, choose whether the copy should be two-sided, the number of copies and the paper size.
- Press the green start button. Wait for the copies.
- Press "Log out" on the display.
Scanning
- Hold the student/employee card at the card reader to identify yourself.
The first time you use your card for printing, you will be asked to log in. Use the PIN code you find in uniFLOW Online (more information in the "Login to printer" section above). - If you have forgotten your card, select "Login" in the display. Log in with PIN code.
- The PIN code you find in uniFLOW Online (more information in the "Login to printer" section above).
- Press "Scan and send" at the top of the printer's display.
- Place one sheet on the platen glass or several sheets in the top sheet feeder.
- Press "Send to myself"
- If you wish to receive the file in a format other than PDF, select "PDF (Compact)"
- Select the desired file format
- You can find Word and PowerPoint formats by pressing "OOXML", here you can also choose OCR to make scanned text readable in a screen reader.
- Press the green start button to scan and email to you.
- Press "Log out" on the display.
Payment
Students, employees and guests print for free via uniFLOW Online